Oreo Cookie Brownie :)

My post for this week is all about a guilty pleasure.!! Hope you enjoy this recipe

Ingredients:

-10tbsp unsalted butter

-1 1/4 cup of white sugar

-3/4 cocoa powder

-1/2 tsp salt

-2 tsp vanilla extract

WC:362Image

-2 large eggs

-1/2 cup of flour

For the oreo layer:

-1 package of oreo.

For the cookie dough layer:

-1/2 cup of unsalted butter(at room temperature)

-1/4 cup of brown sugar

-3/4 cup of white sugar

-1 egg

-1 1/4 tsp of vanilla extract

-1 1/4 cups of flour

– 1/2 tsp salt

-1/2 tsp baking soda

-1/2 tsp baking powder

-1 cup semi-sweet chocolate chips

Instructions

for the brownie layer:

1. In the medium saucepan, melt the butter over medium high heat. Add the sugar and cocoa powder one the butter is melted.

2. Whisk to combine and remove from heat.

3. Add the salt, vanilla and eggs and continuously whisk until the eggs are combined.

4. Add the flour and continue to mix.

5. Set batter aside.

For the cookie dough layer:

1. Cream together the butter and sugars in a mixer.

2. Add the eggs and vanilla making sure to scrape down the sides of the mixing bowl.

3. Add the flour, salt, baking soda and baking powder and mix on low until everything is incorporated.

4. Fold in the chocolate chips.

5. Set dough aside.

Assembly:

1. Pre-heat the oven to 350 degrees.

2. Line the bottom of a 9×9 baking pan with tin foil and then spray the tin foil with a layer of baking soda.

3. Layer the cookie dough on the bottom of a 9×9 baking pan, pressing down to form the bottom of the slutty brownies.

4. Layer as many oreos that will fit on top of the cookie dough. No need to overlap. One single layer will do.

5. Pour the brownie batter on top of the oreo layer and make sure it’s evenly layers on top.

6. Bake for 30-35 minutes. Test with a knife if the center is done. If the knife comes out clean, let the brownies rest before serving.

7. Serve with ice cream or any topping you like.!!

Wardrobe essentials!!

Today post is all about essential items! with this tips you may save time and money for your next night out. It’s all about key pieces that makes fashion interesting.

1- A plain white t-shirt 

A plain white t-shirt is the fashion equivalent of guacamole: it goes on everything and makes it all look better. You can wear yours under a blazer, tucked into high waisted skirts with cutoffs.

2- Black Leggings

Whether you wear them as pants with an oversize sweater, under billowy dresses for extra coverage, or kicking around errands, black leggings are a must-have plus they are really comfortable.

3- Ballet Flats

Chicer than sneakers and more comfy than heels, ballet flats are the best of both worlds and you can have them in a variety of pop colors and different textures.

4- Skin tone matching cami

A skin tone matching cami is about as basic as it gets. Layer it out under blouses or dresses to avoid overexposure! remember a good cami can shape your silhouette.

5- A black cardigan 

Black cardigans are seasonless, timeless and effortlessly chic. Keep one under your desk for aggressive air conditioning, or wear it over a sexy dress on a night out for a hint of sexy and mystery.

6- Classic pumps

Stock your closet with a great basic, goes with everything pair of heels and I promise you’ll wear them to death. Basic colors are black and nude keep always a pair of each for any occasion. 

7- Dark fit-in denim

Flattering and timeless, a pair of dark jeans can do wonders in any woman’s wardrobe. It’s your choice of which jean to pick, the one that best fit and suits your body shape.

8- Classic black pants

Perfect to rock on the weekends, and during the week the’re totally office chic. Black pants are also slimming another reason to pick more than one pair.

9- Little black dress

Women best weapon!! wear it during day with a jewel-toned cardigan and flats and in the night wear it with a statement necklace and strappy heels.

10- Versatile skirt

Dress it up with a tailored shirt or turtleneck or keep it casual with a t-shirt. Think about the skirt that looks best on your body and offers more options in your wardrobe. 

Hope this essential must have help you guys have a more broad perspective of fashion!! 


WC: 385


Vanilla Chai Cheesecake

Hi everyonee!! Since we are in the middle of Fall season I want to share one of the hottest recipe for those who are lovers of chai tea! I’m very happy to present the vanilla chai cheesecake!! a combination of the authentic vanilla cheesecake with a touch of our favorite chai tea. I hope this easy directions will help you guys to prepare this delicious recipe. Hope you enjoy 🙂 

Ingredients:

– 1 1/4 nila wafers, pulverized

– 3 tablespoons of melted butter

– 1 teaspoon ground cardamom

– 2 tablespoons of sugar

– 1 cup of chai latte concentrate

– 2 teaspoons vanilla

– 3 packages of cream cheese, room temperature

– 3 large eggs, loosely beaten

– 3/4 cups of sugar

– 1 tablespoon of cornstarch

– 1 teaspoon of ground ginger

– 1/2 teaspoon of ground clove


Directions:

Simmer 1 cup of chai latte concentrate until reduce to 1/2 cup. Cool. Preheat oven to 350 degrees.

Mix together crust ingredients.

Press well into the bottom of a greased 9-inches springform pan.

Now bake for 12 minutes.

When you take the pan away from the oven reduce its temperature to 290 degrees.

Beat cream cheese with mixer until smooth texture is form.

Add chai reduction and vanilla, blend just until smooth, scraping down sides as you go.

Add sugar, cornstarch and spices. Taste to adjust flavor but be aware of the spices. they will intensify in the oven.

Add eggs, stir by hand until just incorporate.

Put into springform pan, sprinkle a little cardamom on top.

Put a baking dish with 1 inch of water in the bottom of the oven.

Cook cheesecake in middle rack for 55 minutes.

Turn off oven, just barely crack oven doors until steams stops coming out (30 seconds or more) 

Close it back up and let it go for another 55 minutes.

Take out of oven, slide knife around the edges of the pan to release cake and allow for contraction while cooling. 

Place on a cooling rack and cover with a large bowl. Let cools until it’s room temperature, then move to refrigerator.

Note: When cold you can freeze it for longer storage.


WC: 301Image

Homemade Wall Art

Hi everyone my blog post for this week is all about creativity!! Its time for a fresh new environment at your room so I decide to help you guys to create your own homemade wall art. You can save money by decorating your home with your own homemade wall art.

Color block canvas

try painting an artist’s canvas with an easy color block technique for wall art to fit a modern decor. Tape four equal squares, horizontal or vertical stripes or small squares over the entire canvas. Use painters tape to mark your patterns as it removes easily with no resides. If you run the edge of a putty knife along the edge of the tape on the canvas, your white lines between the colors will be crisp and clean. Select acrylic in color to coordinate with your decor, metallic acrylics make the art pop. Paint different colors between the taped lines or go monochromatic with all one color, but different shades.


Fabric wall art

It’s easy to cover a sheet of plywood with fabric that coordinates with your room. With just a measuring tape, scissors and a staple gun, you can turn scrap wood into homemade wall art. Cut the fabric 6 inches larger than the face of your plywood sheet. Your artwork can be as large or small as you like. Lay the fabric face down on a flat surface and center the plywood over it . Pull the sides of the fabric up over the edges and staple it all the way around the perimeter on the back. Personally I would add some vintage jewelry on a corner or strips of sheet metal in a criss-cross pattern for a contemporary look. Remember guys mixed media art is easy to make as long as you use your imagination.


Framed photo college

You can cover a large amount or small amount of wall space with a framed photo college with pictures that you made yourself. Take photos of abstract things and parties. You can hang them a group of four to make a square, or a vertical or horizontal lines along the wall. Color full photos look nice on black or hardwood frames, with light color matting as a background to the colors in the photo. 

                                              Image

WC: 357


Traditional Croissants

Image


My treat for this week is croissant! this recipe you may use for breakfast, lunch and dinner. Is very easy but you may need patience and hand skills! 

Ingredients

-1 1/2 cups of whole milk, heated warm.

-1/4 cup packed light brown sugar.


WC: 430

-1 tablespoon plus 1/4 teaspoon active dry yeast.

-3 3/4 to 4 1/2 cups of unbleached all-purpose flour. 

-1 tablespoon of kosher salt. 

– 3 sticks( 1 1/2 cups) unsalted butter.


Preparation

make dough:

Stir together warm milk, brown sugar and yeast in a bowl of standing mixer and let stand until foamy.about 5 minutes. Add 3 3/4 of flour and salt and mix with dough hook at low speed until dough is smooth and very soft, about 7 minutes. Transfer dough to a work surface and knead by hand 2 minutes, adding more flour as necessary, a little at a time, to make a soft, slightly sticky dough. Form dough into a roughly 1 1/2 inch-thick rectangle and chill, wrapped in plastic wrap, until cold, about 1 hour.


Prepare and shape butter

After dough has chilled, arrange sticks of butter horizontally, their sides touching, on a work surface. Pound butter with a rolling pin to soften slightly. Scrape butter into a block and put on a kitchen towel, the cover with other towel. Pound and roll out on both sides until butter forms as a uniform 8- by 5-inch rectangle. chill, wrapped in towels, while rolling out dough.


Roll out dough

Unwrap dough and roll out on a lightly floured surface, dusting with flour as necessary and lifting and stretching dough( specially in corners) into a 16- by 10-inch rectangle. Arrange dough with a short side nearest you. Put butter in center of dough so that long sides of butter are parallel to short sides of dough. Fold as you would a letter: bottom third of dough over butter, then top third down over dough. Brush off excess flour with pastry brush. 

Turn dough so short side is nearest you, then flatten dough slightly by pressing down horizontally with rolling pin across dough at regular intervals, making uniform impressions. Roll out dough into a 15- by 10-inch rectangle, rolling just to but not over ends. 

Brush off any excess flour, fold in thirds like a letter, as above, stretching corners to square off dough, forming a 10- by 5-inch rectangle. (You have completed the first “fold”). Chill wrapped in plastic wrap, 1 hour. 


Make remaining “folds”

Make 3 more folds in some manner, chilling dough 1 hour after each fold, for a total of 4 folds. Wrap dough lightly in plastic wrap and chill at least 8 hours. finally bake the croissants for 45 minutes. Open the croissant and decorate with nutella, chocolate or cream. Hope you enjoy!!


One-minute college makeup

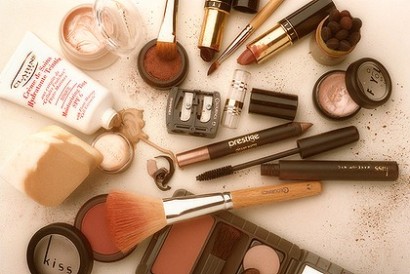
We all have that crazy party, all night studying and late class moment! Yes is all about living the College experience. But when it comes to makeup we must be sure to be a pro. So my blog this week is to help you girls to makeup fast and be able to make it on time for class with style. Follow this tips and I promise you will never be a “rookie” anymore in makeup.

1. We all know that mascara is the secret weapon to instantly playing up your eyes. But who says it always has to be black? Try painting your lashes blue to spice things up.

2. White liner is the beauty world’s best kept secret. Take a break from your signature smoky eye and use white eyeliner in the inner corners of your eyes, and along the water lines, to make your eyes look instantly bigger and brighter!

3. Tired of reapplying your lip-gloss after every class? Try out a lip stain in a berry or red shade and you’ll be well on your way to the perfect, lasting pout! Stains can last up to hours, while glosses con fade after eating and drinking. To apply it smoothly, line and fill in your lips with a lip liner in a similar color, then apply stain on top with a lip brush.

4. Waking up for school can be rough. fake a fresh-faced look even if you’ve been up all night cramming for a test by using a shimmering highlighter on your cheekbones. This is a quick way to get a natural girly glow. Tip: Make sure to smile so you can locate the apples of your cheeks, then apply the shimmer in a downward slant right above them, to create the illusion of higher cheekbones.

5. Leave your basic pencils in the classroom and try out liquid eyeliner to liven up your look. Liquid liners or brushes dipped in gel liner glide on much smoother than the kind you have to sharpen, and the result is more pronounced. if you usually stop your line at the end of your eye, tip the liner upward and extend it out into a slight wingtip (this shape is extra flirty and only takes a minute to complete).

6. When making up your eyes, look beyond just your lids and lashes, eyebrows are actually the feature that frames your whole face, and a little grooming can go extra-long way! if your brows are on the lighter or thinner side, try filling them in with a powder or pencil that is a complementary shade to your hair color. For blondes, that’s usually a taupe color; for darker hair, it’s usually a light or dar brunette shade.

Image

word count: 449

Cream Cheese Flan!!

Hello people my blog post for this week is about another sweet treat!! This is my favorite recipe is called cream cheese flan. The recipe it’s a family tradition I want to share with you. I hope you love it just as me.


Ingredients:

            1 1/2 cups sugar

            1 cup water, divided

            1 8-ounce package cream cheese, room temperature

            1 14-ounce can sweetened condensed milk

            5 large eggs

            1 large egg yolk

            1 cup canned evaporated milk

            1 teaspoon vanilla extract

            Pinch of salt


Preparation

Preheat oven to 350°F. Stir sugar and 1/2 cup water in heavy medium saucepan over medium-low heat until sugar dissolves. Increase heat and boil without stirring until syrup turns deep amber, occasionally brushing down sides of pan with wet pastry brush and swirling pan. Immediately pour caramel into 9x5x3-inch glass baking dish, tilting and rotating dish to coat bottom and 2 inches up sides with caramel. Cool.

Using electric mixer, beat cream cheese in large bowl until smooth. Gradually beat in sweetened condensed milk, then eggs and yolk. Add evaporated milk, vanilla, salt, and remaining 1/2 cup water; beat to blend. Pour custard into caramel-lined dish. Place dish in 13x9x2-inch metal baking pan. Add enough hot water to pan to come 1 1/2 inches up sides of dish. Bake until knife inserted into center of flan comes out clean, about 1 hour. Remove flan from water bath. Refrigerate uncovered until cool, then cover and refrigerate overnight.

Run small sharp knife around flan to loosen. Firmly hold dish and platter together and invert, shaking gently to unmold flan onto platter. Scrape caramel syrup from dish over flan. Slice flan and serve.


Tips

How to unmold the flan

Bake and refrigerate flan as directed. Run metal knife around edge of flan. Invert onto plate; shake gently to loosen. Gently twist to remove pan. To soften any remaining caramel in pan, dip bottom of pan in hot water; spoon caramel over flan.

 Image

 COUNT: 324


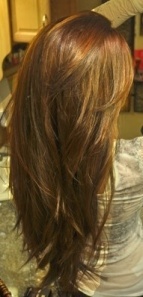
Tips for a healthier hair!!

Hello everyone my blog post for this week is all about hair!!.  4b896481624e4a333e761afd6021d0a6

We all women wish to have the most beautiful hair. I have good news is possible!! just follow this simple tips and your wish will come true.

  1. Taking supplements can help hair growth. Adding a supplement with the right balance of vitamins can help you achieve maximum lengths. Look for a formula made for hair, skin, and nails that have biotin, silica, vitamins B, C, and E, iron, and omega-3.
  2. Your hair is affected by what you eat. If you suffer from a dry scalp, try incorporating more omega-3 and fish oils into your diet. Vegans should also make sure to supplement their diet with protein and iron for maximum hair health.
  3. Your scalp needs exfoliation. Just like you exfoliate the skin on your face, your scalp can also benefit from a good scrub. I suggest adding a few spoons of sugar to your shampoo to help get rid of dead skin cells, using the pads of your fingers to work the mixture in. Always avoid using your fingernails when scrubbing.
  4. Add protein for frizzy hair. If your hair is especially frizzy, substitute the hot oil treatment with a protein mask once a week. Mix the yolk of two eggs with a bit of warm water. Using your fingers, massage this into your scalp and hair shaft. Wrap your head in plastic wrap or a shower cap, and then wrap your head in a towel. Leave this sit in your hair for an hour, then rinse in warm to cool water.
  5. Don’t brush your hair when it’s wet. Wet hair is weaker than dry hair, so don’t ever brush or use a fine-toothed comb on your hair when it is wet. After washing and towel drying your hair, only use a wide-toothed comb to detangle it if you must.


And the last tip is to be patient!! Everything in life is a process so take this tips one step at a time and good luck. You’ll see how its worth it.


Count: 340

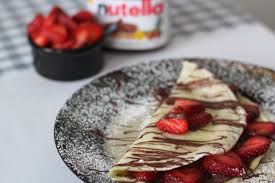
Nutella Crepes!!!

images

Hello everyone my post for this week is all about sweet treats. Here is one of my favorites recipe. Hope you enjoy just as me!!!

First we must know what we are cooking, so here is a brief explanation of the origin of crepes. A crepe is a thin type of pancake usually made from wheat flour. The word, like the pancake itself, is of French origin, deriving from the Latin crispa, meaning “curled.” While crêpes originate from Brittany, a region in the northwest of France, their consumption is nowadays widespread in France and is considered the national dish.

Ingredients

6 tablespoons unsalted butter

2 large eggs

1 large egg yolk

½ cup water

1 cup of milk

½ teaspoon salt

1 cup all-purpose flour

½ cup of nutella

Directions

  1. In a medium nonstick pan over medium heat, melt the butter. Once the butter is melted, continue cooking until the butter is golden brown. Remove from the heat and set aside.
  2. In a medium bowl, gentle whisk together the eggs, egg yolk, water, milk and salt until just combined. Add the flour and whisk until smooth. Slowly pour the browned butter into the mixture, whisking constantly. If necessary, strain the mixture to remove any lumps.
  3. Use a paper towel to wipe out the same nonstick pan used to melt the butter. Set the pan over medium heat. Using a 1/3 cup measure, scoop the batter and pour it into the center of the hot pan. Swirl the batter around and out to the edges of the pan, the thinner the better. Return the pan to the heat and cook for 2 minutes. Use a rubber spatula to lift up the edge of the crepe and flip the crepe over. Cook on the other side for 30 seconds to 1 minute. Depending on how golden you like it.
  4. Slide the crepe onto a plate and spread until 1 tablespoon of the nutella(or as much as you like). Fold the crepe in half, then fold in half again to form a triangle.
  5. Final step garnish with desired toppings such as strawberries, banana slices or whipped cream.

Hope you enjoy this delicious recipe I made specially for you guys!!

WC: 340

Mix and match

Good morning people!! My first post is inspired in the art of mixing and matching. Mix and match is an easy way to use most of your clothes in a versatile and creative way. Today we are going to learn the basic rules of mix and match.

First step: The base. Base is the foundation of an outfit and where you begin your creation. These pieces are what we call your hard pieces. hard pieces can be a suit, a pair of pants, colorful shorts, a dress or a basic pair of jeans.

Second step: Now its time to move onto the accent pieces. Accent pieces are what you will wear with your base pieces and they are usually tops, cardigans, and layering pieces that you can wear underneath your suits, jackets and cardigans. Like your base you need variety. While your base pieces are typically heavy in neutrals, your accents can be a mix of color and neutral shades.

Third step: Pop pieces. Pop pieces are jewelry, belts, shoes, handbags and those small details that go a long way. What you want to think about when buying pop pieces is your accents and the colors in your base.

Taking time to create outfits is essential because it allows you to see what you may be missing in your wardrobe and it will also help you become more purposeful with your shopping.

The image you will see is a good example of mix and match. The model has a yellow blazer with red bottom and red shoes as well, and a shinny sequin tank top. The outfit is totally colorful and vivid. Is creative, casual and dressy at the same time. For a lunch or even a night event this outfit is totally innovated.

COUNT.

Image from my favorite blogger wendyslookbook.com

Image